

When HDMI was conceived, it was to be the one style of connection you would need around your home media centre to carry video, audio, remote control signals and even Ethernet. While it was digital, and hence loss-free under normal circumstances, it also carried a disadvantage in that most output devices would use HDCP encryption – a form of copy protection. As a result, no HDMI capture equipment existed for many years, and only a limited number of converters were available initially to overcome connectivity requirements.
Despite this, recently the market has seen the introduction of HDMI capture devices, including internal PCIe based capture cards and USB 2.0 external capture boxes. Many of these were targeted at PC and console gamers as a way to record and preserve gameplay, or to provide an acquisition interface for live-streaming purposes (e.g. Twitch).
The main benefit of this arrangement, as compared to software based screen capture, is that the capturing is assisted by hardware compression and acquisition and thus does not reduce the performance of the graphics hardware or result in “stuttering” recorded output. What you see is (almost) what is recorded.
Of course, graphic card manufacturers have realized the utility of this, and thus later series graphic cards come with hardware accelerated encoding hardware and utilities which allow for screen capture and streaming, for example Nvidia Shadowplay, and GVR. This allows you to achieve virtually the same thing for PC gaming. Another bonus is that this technology is also leveraged for “streaming” gameplay over home networks for “remote” game rendering situations.
But in reality, the utility of HDMI capture extends beyond that of gaming capture and owning an HDMI capture card allows you to continue using older GPUs, do captures from “something” to HDMI converters or create captures from console sources.
I’m not really a gamer, but I do appreciate the utility of having an HDMI capture box, so I decided to purchase an AverMedia C875 Live Gamer Portable.
Unboxing and Features
The first thing I should mention is that this product was purchased out of region, direct from Taiwan, because it cost the same posted (~AU$150) as purchasing from a bricks and mortar store, and I couldn’t physically make it to a shop. As a result, all the text is in Chinese.

The item arrives in a colour-print matte-finish cardboard “nesting” box. The top is adorned with a picture of the product with a “shining” quick record button.

Most HDMI capture cards and boxes are inevitably tied to a computer to perform control and storage. The C875 is capable of operating in this mode, sending the hardware-H.264 encoded video (at up to 60Mbit/s) and AAC-LC audio (at up to 256kbit/s) over the USB 2.0 link. It supports a wide range of PC and consumer electronics (i.e. TV) resolutions in this mode. It also supports live streaming with PC-connected mode.
The AverMedia Live Gamer Portable has one extra feature up its sleeve – it is capable of standalone capturing to a FAT32-formatted Class 10 SD/SDHC/SDXC card. All you need to do is supply USB power from either a USB port on the device or a power-bank, and you can capture at the press of a button. This makes it ideal for portable usage, but it only supports a more limited set of resolutions – i.e. standard definition and high definition TV resolutions and has no quality controls (video encoding up to 16Mbit/s, audio at 256kbit/s). Inputting other resolutions will result in either an error or strange captures with black bars around the edges and scaling.

The unit is fairly light at 117 grams, and also features the ability to accept component video and Playstation 3 input. The unit supports HDMI pass-through, or inputting/outputting DVI signals provided you use an HDMI to DVI cable or adapter. Regular 3.5mm stereo jack connections are also provided for audio if not using HDMI audio. The minimum system requirements for PC-connected mode are shown.


The unit comes with a one year warranty, and a bonus 3-month subscription to Xsplit Live Broadcaster via unique gift certificate code, which appears to be an AverMedia service.
Removing the top lid of the cardboard box reveals the main unit sitting on a plastic tray. The first thing you will notice is the yellow tape which warns you that the SD card slot requires a Class 10 card and must have it formatted as FAT32 (exFAT is not supported).

Peeling that away, we can properly admire the design of the unit.

The unit is finished in a mixture of textures and colours which gives it a stylish but also contrasted feel. The top of the unit features a capture quick button with translucent plastic ring for the LED status lights to shine through. The capture button has a good positive travel and click on activating. The top grey-plate and capture button are finished in a textured aluminium finish, which feels quite nice.
This is juxtaposed with the glossy “racing red” coloured plastic and matte black plastic rear. It’s probably not the most elegant “complement” to the home-Hi-Fi style finish at the top, but it might appeal to the gaming “target market”.
The unit is light, but feels solid enough for regular transportation.

The underside of the unit is mostly covered by a rubber self-adhesive mat to avoid the unit “sliding around” on tables, which is a nice design feature, but probably a little futile given the light weigh of the unit. The manufacturing date is listed as 2014 on the underside label, serial number has been blanked out.

Going for a tour around the unit on the top side, starting from the left, we have the AV in jack for use with the supplied break-out cables. This proprietary looking jack is used for component video and analog audio only. No composite or S-video capture is provided. This is used for component capture and Playstation 3 capture. Make sure you don’t lose those included cables.
HDMI in and HDMI out is provided, as a loop through. This unit acts as an HDMI Sink, and will be detected as the “display” by your devices. You don’t have to use the HDMI out, but it provides the ability to record without losing real-time display of the video being recorded.
Two 3.5mm stereo jacks are provided for audio in and audio out, where HDMI audio is not being used. This allows for analog audio to be input into the capture-box, which is especially useful in PC-connected mode where you can configure the audio sources.

The right side features the full sized SD slot, with a positive push-click and push-release action. This is used only for standalone capture mode – you do not need an SD card if you are using this unit for USB tethered capture, although you can opt for the cheaper Live Gamer Portable Lite if that’s the case.

The bottom side features a mode-selector switch which allows you to select PC or PC-free capture modes. This switch is a little easy to slide, especially putting it in and removing it from the case, so do be sure to check on it before you start using it. You will know you’re not in the right mode when the LEDs don’t light up the colour and pattern you expect them to (they’re dual-coloured, red and blue).

Connection to the PC for data, as well as power supply to the unit, is made via the USB miniB connector on the left side. Note that this is not the microB connector used on most Android smartphones, but the older larger type.

The unit comes with a neoprene zip pouch to house the main unit during transportation. Unfortunately, Avermedia didn’t take into account the need to transport cables with the main unit, and the pouch will not accomodate even a few necessary cables. A cable pouch might have been nice.
Supplied is an AV in to PlayStation 3 cable, AV in to component video and analog audio break-out cable, a 3.5mm to 3.5mm stereo audio cable, a USB to mini B cable and a short HDMI cable.

A quick start guide, regulatory information, Xsplit Broadcaster Gift Card (with expiry) and a single page telling you to download your software online is also included in the packet.
Teardown
Naturally, given such an interesting product, after I was done with its “main mission”, I decided to tear it apart to see what was inside, and how it worked. The unit can be disassembled by peeling back the self-adhesive rubber mat around the corner and undoing four Philips head screws. This allows the rear cover to be removed from the unit.

The rear of the PCB is already loaded with quite a few chips. The PCB is dated week 40 of 2014. The major components visible on this side include:
- SD card slot, which appears to also support more connections than strictly necessary (multi standard card slot?)
- A debug/JTAG interface below it (likely)
- NXP LVC244A Octal Buffer/Driver with Tri-state Output (many of these!)
- TI PCA9515B (marked 7SF) Dual Bidirectional I2C Bus Repeater
- Nuvoton NUC100RD2BN ARM Cortex-M0 up to 50Mhz CPU
- LV4053 Triple 2-channel analog multiplexer/demultiplexer
- Pericom PT7C4337 (marked 7C43 37UE) I2C RTC Module
It seems the Nuvoton ARM CPU forms the heart of the system and probably deals with the USB and SD interfaces. The Pericom RTC supplies the date and time which is used for file naming in standalone mode. The balance of the components seem to be mostly related to power conditioning.

The top side has even more components:
- Mitsubishi CR2032 battery, dated 22nd September 2014 for RTC backup
- Multiple pairs of surface mount LEDs for the glowing ring, and a microswitch for the push button.
- ITE IT6604E Single-Link HDMI 1.4 Receiver with HDCP, DVI, 3D Support
- ITE IT6613E HDMI 1.4 Transmitter with HDCP, DVI, 3D Support
- TI TVP7002 Video and Graphics Digitizer with Horizontal PLL
- NXP LVC244A Octal Buffer/Driver with Tri-state Output (many of these!)
- Altera SM40ZE MAX V CPLD
- TI DRV602 DirectPath Pop-Free 3Vrms Line Driver with Adjustable Gain
- TI TLV320AIC3101 Low-Power Stereo Audio Codec for Portable Audio/Telephony
- Nanya NT6DM16M32BC 512Mbit LPDDR
- Winbond W25Q64FV 64Mbit Serial Flash with Dual/Quad SPI and QPI
- Mystery ground-off IC marked AH 1444.
Date codes seem to range from Week 49 of 2014 for the CPLD, Week 14 of 2014 for the Nanya RAM, Week 30, 2014 for the Winbond Serial Flash to Week 44 of 2014 for the mystery IC. The silkscreening indicates the PCB is version B1, and this is shared with the LGP Lite as well (GL310). There seems to be another debugging connector, JP4 on the left. Ferrite chips are mounted on the board near the HDMI and USB outputs, as good design dictates. JP3 and JP2 are probably connected to the audio somehow.
I suppose one disappointment is the fitment of a CR2032 battery. It is replaceable, on a connector, but it is a “consumable” and might need to be replaced one day to maintain the file-naming of standalone recordings. I’m not sure how well the device will operate once it is depleted.
The operation seems to be somewhat straightforward – the ITE HDMI receiver and transmitter pair forms the HDMI loop through as well as providing the raw digital data to the mystery IC. The TI graphics digitizer is responsible for the component inputs, and the TI audio codec and direct path driver is responsible for the analog audio capture and pass-through. The CPLD probably has a role in driving the buffer/driver units to do signal selection and passing through to the mystery IC.

The mystery IC uses the Nanya RAM, Winbond flash and the clock crystal nearby, and likely is a CPU of some sort with hardware H.264 video encoding. While some of the original marking shows through, it’s not enough to actually read. The purposeful grinding away of the surface seems to be a deliberate attempt to “protect” the design but I think the purpose of the chip is pretty obvious.
PC-connected Mode
The first thing you will need to do is to download RECentral, LGP Stream Engine and the firmware update utility and install them in that order. This will install the drivers for the unit, the capture utility, a “stream engine” which allows you to use the capture box with other capture tools and the firmware update utility with version 21 firmware to fix some problems with earlier units. As it turns out, my unit already had the latest firmware, so it was on to using it.
For general capturing and streaming, everything can be controlled through RECentral. For all modes, there are advanced settings available, or a settings wizard or one click option, depending on how much control you want to have over the capture process. The general interface also had some settings available for tinkering:
 Capture Card Selection

General Settings
For general capturing, the system needs to be configured to know whether you are capturing on the same system that is producing the video (which results in hiding of almost all OSDs), or on a separate system (where you get a capture preview window). You also get to configure the capture sources, file type, resolution, bitrates and frame rates.

In other system mode, the next step brings up a preview window which allows you to start and stop while looking at a preview. In Current PC mode, you will need to use either the hotkey or the physical button.

For those who want to use the unit to do live streaming, a similar set of settings is available but with much lower bit-rates to accommodate for the limited upload bandwidth of most connections.

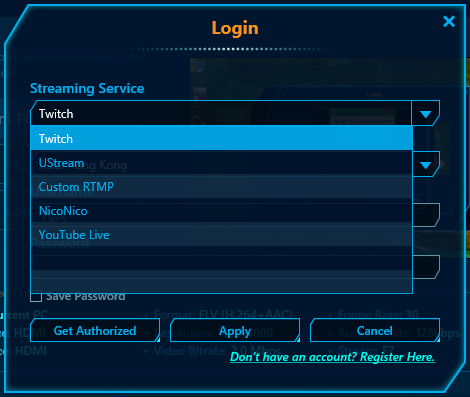
Once you are ready, the next page lets you login to supported streaming services.

In general RECentral was able to perform recording just fine and was easy enough to use. I did manage to crash it once or twice though, the cause was not known.

The other utility is the LGP Stream Engine which allows for the unit to appear as a VfW/Directshow capture interface, so older utilities can access the video from the device. Unfortunately, I had no luck getting this to work properly with Virtualdub (a pretty popular AVI capture and editing utility for Directshow/VfW interfaces), so some work might be needed here. It could be useful with other software which may not have the same requirements of the interface.
Standalone Mode
To use the standalone mode, the mode selector needs to be placed in the standalone mode position and a suitable FAT32 formatted Class 10 SD card needs to be inserted. Applying power via the USB connector, the system flashes its lights in a ring as it boots (which takes about 30 seconds). The ring lights a solid red when the system is ready.
To begin recording, you only have to push the capture button on the box, and the LEDs will “pulsate” in a “breathing” pattern to let you know it is recording. Pressing the button again stops the recording.
Recordings are automatically named by date and time (which I have no idea how to set, but at least it is unique), and are made in the .ts format. They are automatically split to ensure it doesn’t exceed the FAT32 limitation of 4Gb per file. Video quality is adequate, with the bit-rate variable but maxing out about 16Mbit/s in my experience. Audio is always compressed as AAC-LC at 256kbit/s.
It is important to remember to set your source to put out a signal of the right resolution. Outputting at different resolutions can result in recording error (i.e. blue flashing) or black bars around the image area on the recorded video with scaling and associated “softness”. Occasionally, it seems that files with no audio are recorded due to incorrect HDMI mode-detection. Unplugging and replugging the HDMI cable after the LGP has booted seems to solve the issue.
Capture Box Limitations
Having used the capture box for a while, there are a few points and limitations to note. While the box will pass through HDCP protected content, it will not perform any recording of HDCP protected programs. Pressing the capture button will result in no action in standalone mode. You must ensure your intended recording outputs are not HDCP protected.
In standalone mode, recording quality is slightly limited due to the maximum bit-rate being fixed to about 16Mbit/s, which is less than the 60Mbit/s available for PC-connected capture. The resolutions available for recording is also limited to the standard TV resolutions, and using an unsupported resolution can result in black bars in your recorded output. The recorded files are automatically segmented due to FAT32 file size limitations, and are in transport stream (.ts) format – you can remultiplex this with tools provided by AverMedia or by using TSMuxer.
The frame rates supported by the box seem to top out a 30fps in 1920×1080 – this box is not capable of providing 60fps which seems to be a feature that gamers desire to improve the smoothness of the streams.
The audio captured from this unit is always compressed with AAC-LC, thus audio aficionados will be somewhat disappointed by the lack of “bit-matched” recording.
Another important thing to understand is that the chroma subsampling format of this capture box is 4:2:0. Our eyes are generally less sensitive to chroma (colour) than luma (brightness), and a common compression technique is to subsample (reduce the resolution of) the chroma component. This is used in image compression, for example JPEG. For “smooth” photographic content, it is rarely noticeable but for sharp edges (text, lines) you can notice a loss of sharpness and colour “bleeding”.
Unfortunately, encoder and decoder support for “professional” 4:4:4 and 4:2:2 chroma formats is less widely available but is preferable for clearer screen captures of productivity software that approach the clarity and sharpness of still screen captures. AverMedia do have products with better chroma resolution, although they lack the standalone recording ability of the Live Gamer Portable.
Sample Recordings
The main reason I purchased this unit was to be able to make videos of software running on a computer for review purposes. Using software screen capture utilities has often led to limited frame rate updates and juddery results, so I opted for a hardware capture solution. The overall quality is sufficient, although some of the disadvantages of chroma subsampling is evident.
Conclusion
The AverMedia Live Gamer Portable is a unique HDMI capture solution which offers the ability to perform hardware captures without the assistance of a computer. The unit is feature rich, with HDMI loop output, analog audio capture and component capture ability. The unit performed mostly as advertised, despite an occasional crash or audio-negotiation quirk. While the quality is not “perfect”, this is a common drawback due to the hardware compression nature of the capture process. It is generally sufficient for most users. It came in very useful for portable recording of the screen in the field.
Of course, the feature-set may not be the most suitable for all – if you wish for 60fps captures at full high definition, or you demand lower levels of chroma subsampling, or higher quality audio capture, you should choose a different product.
Pingback: Teardown, Analysis: Unbranded Metal Case HDMI 2-Port Splitter | Gough's Tech Zone
detailed tear-down ;)… nice !
I have one too and trying to make it work on linux. the greyed out chip is mostprobably a PL330 or similar from sigmas design. If you look into the firmware update package. uncompresse it you will see the name of the chip… – so… not so hidden in the end.
Thanks for the tip – indeed you are most probably correct. That thought didn’t cross my mind, although I did use the firmware update and it turns out that mine was already updated to the latest version.
– Gough
Did you ever made it work with linux? I’m particularly interested to use it with MythTV. I couldn’t find any reference on v4l.
I’m also considering the stripped down GL310 which is much cheaper but I think has the same drivers problem.
I haven’t tried it with Linux, because I tend to use it mostly in standalone mode.
– Gough
There is no support whatsoeverfor linux for the lgp and lgp lite. There are some projects to make them working but it involve reverse engeenerring the driver.
care to share these projects links/pages/info? I’d like to help this process… LGP on Linux would be awesome.
Hi! Can you post a link of those projects? Thank you!
I sent an email to Avermedia asking for linux support, let’s see if they reply.
I did the same to Hauppauge about their HD PVR 2 Gaming Edition and they sent me the linux drivers source, beta though. The problem is, I think this is a better card, lighter, no AC adapter…
jss
if they provide you any type of beta drivers, please let us know! I’m very interested in that 🙂
If you mean hauppauge, they sent me this link:
https://www.dropbox.com/s/6kjt0ztxljan0tc/hauppauge_driver_src_ver5.tgz?dl=0
Contrary to what people say on the net, they seem much more linux friendly than avermedia that never replied.
Thank you for the Sources 🙂 I didnt managed to get this kind of data from them when i tried before.
Will have to give it another look.
Update : tried to compile the driver but seems it is for the HDPVR2 not the Rocket 😉 as it is looking for the USB ProductID E524 ( that seems to e the HD PVR2.
Hello friends Today I bought the device Live Gamer Portable I can record registered in 1080 on the SD memory card 10 CLAS I installed everything on your synagogue properly if the software and I set him 1920-1080 18.0MBPS 128 25 According to what he prescribed, I can record this quality 3.48 hours How does the card recorder I just 1280-720 When I record directly to your computer it records in 1080 The question? Why is this the card recorder 720 or 1080
Very nice tear down. The information presented here will be very useful for an upcoming project. You said that “The audio captured from this unit is always compressed with AAC-LC, thus audio aficionados will be somewhat disappointed by the lack of “bit-matched” recording.” – Actually a real bright note here is that the ADCs seem to be of very high quality. Compared to several similar recorders the ability of the Gamer to accurately record square waves makes it stand out in my opinion. We are using several in our lab in stand alone configuration. Using the analog inputs we record SMPTE linear time code on one channel and intercom audio on the other. We do the same on GoPros and with a quad security cam DVR. This is all done for later realtime synchronized playback of the screen captures w/ the real world camera views. The Gamers record the timecode more faithfully than the others and is equal to some highly regarded stand alone audio recorders.
I have one of these units and it stopped working one day. I use this to help record from a live video source. Worked great. I bought a replacement, but looking to breathe new life into the old one. Confirmed good power source. Any tips on debugging!